Photocell Sensor Wiring Diagram Instruction
Different Types 0f Photocell Sensor’s Wiring Diagram Instruction
JL-103
Direct Wire-in Thermal Photocontrol (Traditional Button Type)

インストール
Disconnect power, remove junction box cover, place the SWITCH in knockout hole and fasten with lock-nut.
Wire according to the diagram:(photocell wiring diagram)

Do not install the switch with the Photocell facing artificial or reflected light. This will cause the unit to cycle on and off at night.
JL-104
Direct Thermal Photocontrol(Swivel integrated)
インストール
Disconnect power, place screw thread of the SWITCH in knockout hole and fasten with rubber gasket and Zinc alloy lock-nut.
Wire according to the diagram:

Do not install the switch with the Photocell facing artificial or reflected light. This will cause the unit to cycle on and off at night.
JL-106
Direct Wire-in Thermal Photocontrol
JL-106

インストール
Disconnect power, place screw thread of the SWITCH in knockout hole and fasten with rubber gasket and Zinc alloy lock-nut.
Wire according to the diagram:

必要に応じて、シェーディング ストリップをスライドして、好みのオン/オフ レベルに設定します。.
Do not install the switch with the Photocell facing artificial or reflected light. This will cause the unit to cycle on and off at night.
JL-118A
Direct Wire-In Thermal photocontrol

インストール
Disconnect power, place screw thread of the SWITCH in knockout hole and fasten with rubber gasket and Zinc alloy lock-nut.
図に従って配線します。

必要に応じて、シェーディング ストリップをスライドして、好みのオン/オフ レベルに設定します。.
Do not install the switch with the Photocell facing artificial or reflected light. This will cause the unit to cycle on and off at night.
JL-126
Direct Wire-in Thermal Photocontrol(Aluminum Die-cast
Enclosure heavy duty )

インストール
Disconnect power, place screw thread of the SWITCH in knockout hole and fasten with rubber gasket and Zinc alloy lock-nut.
Wire according to the diagram:

必要に応じて、シェーディング ストリップをスライドして、好みのオン/オフ レベルに設定します。.
Do not install the switch with the Photocell facing artificial or reflected light. This will cause the unit to cycle on and off at night.
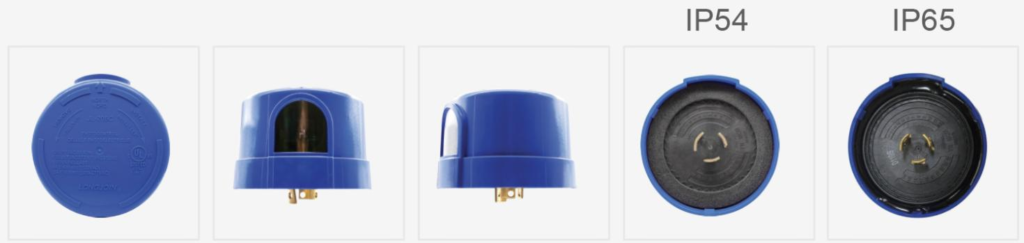
JL-202
Thermal Photocontrol
NEMA Twist-lock
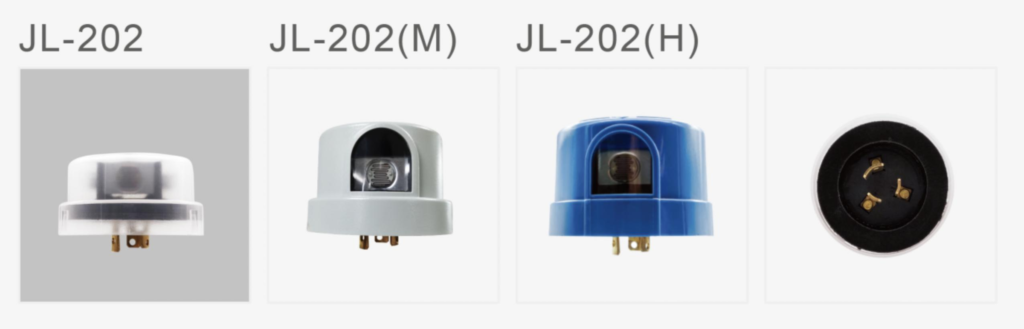
インストール
電源を切断し、下の図に従って色分けされたレセプタクルに配線します。.
フォトコントロールを押し込み、時計回りに回してレセプタクルに固定します。.
必要に応じてレセプタクルの位置を調整し、フォトコントロールの上部に示されているようにフォトセルが北方向を向くようにします。.

JL-205C & JL-205-12D/24D
Electronic Photocontrol Fail-On
インストール
電源を切断し、下の図に従って色分けされたレセプタクルに配線します。.
フォトコントロールを押し込み、時計回りに回してレセプタクルに固定します。.
必要に応じてレセプタクルの位置を調整し、フォトコントロールの上部に示されているようにフォトセルが北方向を向くようにします。.

JL-207
Digital Electronic Photocontrol (Long life version)
インストール
Disconnect power; wire the receptacle according to the diagram below.
フォトコントロールを押し込み、時計回りに回してレセプタクルに固定します。.

Install the photocontrol with the Photocell facing the NORTH direction as indicated on the top of the photocontrol.

必要に応じてレセプタクルの位置を調整します。.
JL-208-IP66
ショートキャップ

インストール
Disconnect power; wire the receptacle according to the diagram below. Push the Shorting
Cap on and twist it clockwise to lock it into the receptacle.

JL-312C
Bulb Holder ControlLER(candelabra)

インストール
· Disconnect power;
· Screw bulb off from E12 socket;
· Put the light control unit into the E12 socket, and then turn clockwise to tighten;
· Screw bulb into the bulb holder of the unit;
· Connect power; Turn lamp switch ON.
· Avoid to use the unit in an opaque or reflective glass lantern, as well as use in a wet place.

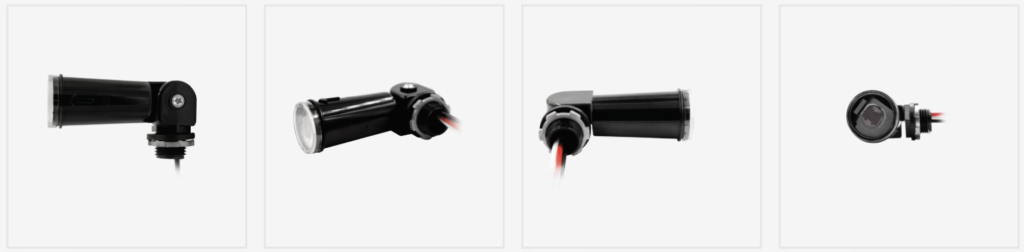
vJL-401C/401CR
Direct Wire-In Electronic Photocontrol

インストール
Disconnect power, place screw thread of the photocontrol in knockout hole and fasten with rubber gasket and lock-nut. Wire according to the diagram in below. Do not install the photocontrol with the Photocell facing artificial or reflected light. This may cause the unit to cycle on and off at night.

JL-403C
Direct Wire-In Electronic

インストール
Disconnect power, remove junction box cover, place the photocontrol through knockout hole and fasten with locknut. Wire according to the diagram in below.
Do not install the photocontrol with the Photocell facing artificial or reflected light. This may cause the unit to cycle on and off at night.

JL-411(R)-12D/24D
Direct Wire-In Electronic Photocontrol(DC)

インストール
Disconnect power, place screw thread of the photocontrol in knockout hole and fasten with rubber gasket and lock-nut. Wire according to the diagram in below. Do not install the photocontrol with the Photocell facing artificial or reflected light. This may cause the unit to cycle on and off at night.

JL-428
Conduit Wire-In Digital Photocontrol (Zero cross +FCC)

インストール
Disconnect power, remove junction box cover, place the photocontrol in knockout hole and fasten with locknut. Wire according to the diagram in right hand.Do not install the photocontrol with the Photocell facing artificial or reflected light. This will cause the unit to cycle on and off at night.

JL-712A3 Zhaga Book-18 Zhaga Controller

Wiring diagram

インストール
The interface of the product itself has been fool-proof design, the installation only need
to tighten the controller directly to the rotatable base, as shown in Figure clockwise after
insertion.

JL-241/242/243
Smart Dimming Photocontrol

インストール
電源を切断し、下の図に従って色分けされたレセプタクルに配線します。.
フォトコントロールを押し込み、時計回りに回してレセプタクルに固定します。.
必要に応じてレセプタクルの位置を調整し、フォトコントロールの上部に示されているようにフォトセルが北方向を向くようにします。.

If you need more and more detailed pdf files of all the linked drawings of the products, please feel free to ask us for them!
info@chiswear.com