Outline
- Introduction
- Why Is Proper Adjustment of a Dusk-to-Dawn Light Sensor Important?
- Step-by-Step: How to Adjust a Dusk-to-Dawn Photocontroller
- What Common Adjustment Mistakes Should You Avoid?
- Which Long-Join Photocells Make Adjustment Easier?
- How Can Minor Adjustments Have a Big Impact?
- Bottom Line
Photocontrollers keep outdoor lights on only when needed. But what happens when it malfunctions? The results could be power waste and reduced efficiency. Thus, adjusting your dusk-to-dawn photocell is critical. It ensures your lights respond accurately to real lighting conditions.

Why Is Proper Adjustment of a Dusk-to-Dawn Light Sensor Important?
Correct calibration does more than feel right—it delivers measurable advantages:
Energy Efficiency Driven Sustainability
Light sensors regulate lighting operations. This significantly trims unnecessary power use and lowers electricity bills. It also supports sustainability by cutting carbon output.
Reliable Lighting
When a sensor activates precisely at dusk and deactivates at dawn, it keeps spaces lit when people need it most. This reliability improves visibility and reduces accident risks.
Scalability
From a single porch light to streetlamp networks, properly adjusted photosensors can cut maintenance costs by reducing unnecessary cycling and bulb wear. Plus, they remove the need for manual switching and prevent mismatches in timing across multiple sites.
Step-by-Step: How to Adjust a Dusk-to-Dawn Photocontroller
Locate the Light Sensor Unit
Finding the lighting control is the first step to effective adjustment. Most dusk-to-dawn photocells are mounted on top of the light fixture or control box. Here is a table outlining common dusk to dawn sensors mounting heights and viewing angles.
| Mounting Height | Recommended Viewing Angle | Reasoning |
| 2–3 meters | 15–20° tilt downwards | Better ground-level light detection |
| 4–6 meters | Horizontal or slight tilt | Balanced horizon and ground sensing |
| 7+ meters | Slight upward tilt | Prevents premature activation |
Placement Guidelines
- The photocell switch should be placed horizontally. Its hood or shade should be on top, ideally facing north. This reduces false readings from direct sunlight or nearby fixtures.
- Avoid mounting near the lighting it controls. Position it so it receives natural light only.
Model Identification: NEMA Twist-lock vs. Fixed-wire
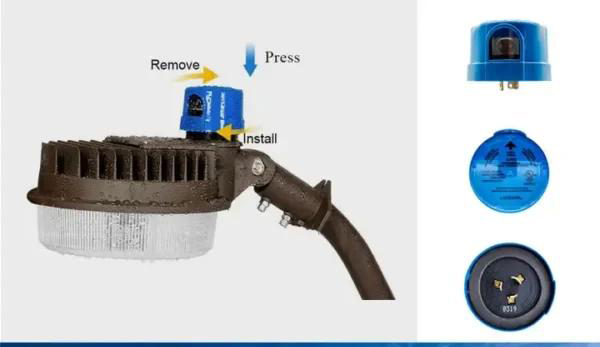
NEMA twist-lock models are typically screwed into a holder atop streetlights or poles. Fixed-wire models are embedded inside the fixture or control box. They require opening the housing to access or adjust.
Quick Inspection Tips Before Adjustment
- Power off the circuit to avoid contact hazards.
- Look for a small dome or “eye” on top of the light—it’s often the sensor.
- In case you don’t find it, carefully open the control box to locate the fixed photocell.
- Confirm it’s free of obstructions like paint, debris, or water.
Understanding Default Lux Settings and Why They Matter
Lux thresholds define when the light turns on and off. Fine-tuning them ensures precision performance. Standard sensors often switch ON at around 20 lux (dusk) and switch OFF between 70–80 lux (dawn).
Ratio Types and Their Behavior
- Positive ratio: OFF threshold is higher than ON. For example, ON at 20 lux, OFF at 30 lux. Works well for stable cycling. Well suitable in tunnels or areas with low ambient light at dawn.
- Negative ratio: ON threshold is higher than OFF. For example ON at 70 lux, OFF at 35 lux. Useful for lighting that needs warm-up time. Mostly applicable in parks and pedestrian zones, ensuring safety before full dusk.
Understanding Early vs. Delayed Activation Needs
A lower ON lux threshold means lights turn on later, when it’s darker—saves energy but may reduce safety in low-light conditions. A higher ON threshold activates lights earlier, increasing visibility at the cost of slightly higher runtime.
Adjust the Photocontrol Receptacle for Maximum Performance
Adjustment methods vary by model—but all aim to sync light activation with real conditions:
Screw-Type Dial Controls
Many industrial-grade or twist-lock photocells provide a dial or DIP switches for setting the lux threshold—typically between 10–100 lux. Here is table recomedning Lux level for various spaces.

| Space / Environment | Recommended Lux (ON) | Recommended Lux (OFF) |
| Street Lighting | 10–15 lx | 30–40 lx |
| Pedestrian Walkways | 5–10 lx | 20–25 lx |
| Parking Lots | 15–20 lx | 40–50 lx |
| Tunnels | 50–100 lx | 150–200 lx |
| Coastal Installations | 15–20 lx | 40–50 lx |
Digital Control Panel
Premium sensors may feature an LCD panel or buttons. These allow you to program both lux thresholds and built-in delay times to prevent flicker from passing light fluctuations.
App-Based Configuration
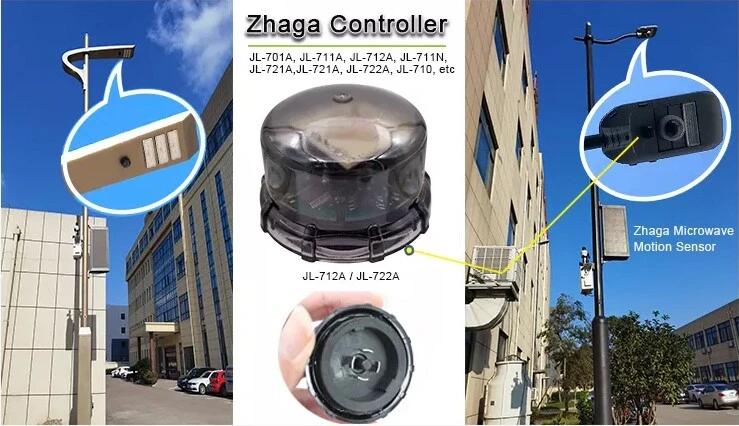
Smart systems let you adjust street light controller via mobile app or cloud interface. You can remotely set lux levels and schedule operations. These setups are ideal for large-scale installations. Common coomunication protocols include Zigbee and LoRa.
How These Affect Activation Timing
- Turning the dial toward a higher lux level triggers lights sooner (at brighter ambient light).
- Digital panels and remote options offer exact control and logging.
- Delay settings help avoid nuisance ON/OFF cycles from transient light changes.
Use a Lux Meter for Fine-Tuning?
A lux meter offers measurable precision—far superior to guesswork. This helps align LED street light photocell settings to actual environmental conditions, rather than arbitrary calibration. You can see exactly when your target lux threshold is reached (e.g., 20 lux at dusk). Then match your sensor’s ON/OFF settings to those values.
Adjustments According To Dusk and Dawn
Real-world testing ensures your adjustments hold up under actual conditions:
Steps for Verifying ON and OFF Timing
- Restore power after adjustment.
- Cover the sensor at dusk to simulate darkness and verify lights turn ON.
- Uncover at dawn to confirm lights turn OFF, preferably with minimal delay.
Identifying and Fixing Timing Errors
- If lights stay on too long in daylight, reduce the OFF lux threshold.
- If activation lags or fails, raise lux ON level or adjust delay settings.
- Persistent issues may signal misalignment, obstructions, or sensor fault.
Monitoring Over Multiple Days
Observe several dusk–dawn cycles. Weather and seasonal changes can shift ambient lux patterns. Use that data to tweak thresholds again over time. Consistency across days confirms success.
What Common Adjustment Mistakes Should You Avoid?
Avoid these errors—they undermine sensor performance:

Blocking the sensor’s view
Covering or shading the light sensor switch—by debris, paint, foliage, or mounts—causes misreads and erratic switching. Keep its window clean and exposed.
Nearby artificial light interference
Reflective spaces can trick the sensor into thinking it’s still day. This prevents lights from activating at the right time.
Overlooking seasonal daylight shifts
A setting that works in winter may fail in summer. Don’t leave the lux thresholds static—adjust when daylight hours change significantly.
Which Long-Join Photocells Make Adjustment Easier?
| Model | JL-207 | JL-243 | JL-103 |
| Adjustment Method | Screw-type dial | Digital control panel | Pre-calibrated (factory) |
| Best Application | Street lighting, general outdoor use | Industrial sites, commercial areas | Parks, walkways, low-maintenance areas |
| Key Features | Precise manual lux control, durable casing | Fine-tuned settings, quick reconfiguration | Simple setup, reliable fixed settings |
| Protection Rating | IP66 | IP67 | IP66 |
| Compliance | UL773 | UL773 | UL773 |
How Can Minor Adjustments Have a Big Impact?
Small tweaks can reap significant benefits. Exact lux settings avoid unnecessary runtime, drop energy use, and lower stress on lamps and relays. Lights that switch precisely when needed improve visibility and build trust in system consistency.
Long-Join offers smart photocells, remote updates, strong certifications, and robust housings to support durable, high-performance lighting networks.
Bottom Line
Proper sensor adjustment maximizes lighting efficiency. It improves safety and reduces unnecessary energy use. For reliable dusk-to-dawn smart photocells, Chi-Swear offers quality solutions trusted by professionals.


