install:
Greetings, fellow outdoor lighting enthusiasts! I’m excited to share my knowledge with you today as the CEO of Long-join, a company that boasts over two decades of expertise in crafting exceptional outdoor lighting solutions. So, let’s embark on this journey together to demystify the installation of a photocell sensor for your outdoor lighting systems. Let’s shed some light on this process! Resource
Understanding the Magic of Photocells
Before we roll up our sleeves and get into the nitty-gritty of installation, let’s take a moment to appreciate the magic behind photocells. These clever devices, also known as dusk-to-dawn sensors, possess the remarkable ability to sense ambient light levels. As the sun sets, they trigger your outdoor lights to illuminate your surroundings, and when daylight graces us once again, they gracefully dim the lights. It’s like having your outdoor lighting on autopilot!

Gathering Your Tools and Materials
Alright, let’s gear up with the essential tools and materials required for this installation adventure:
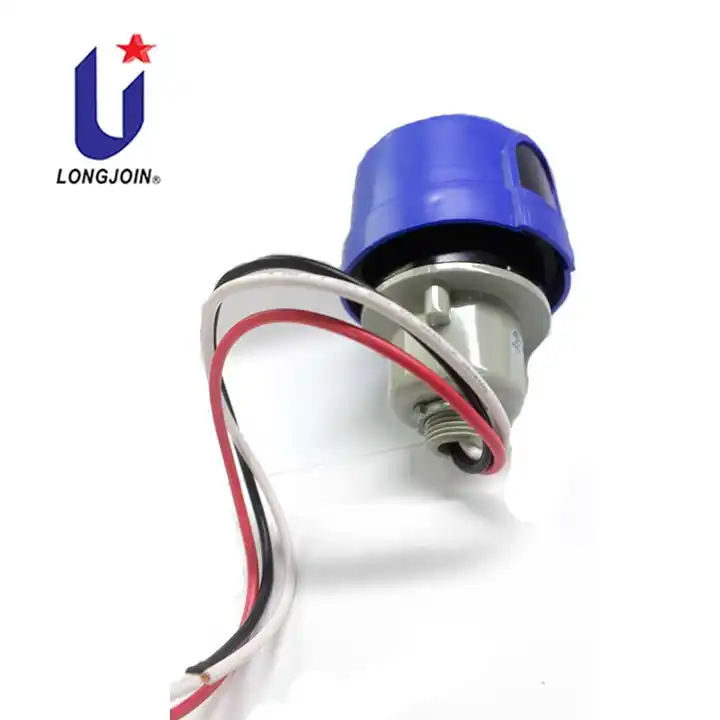
- Photocell Sensor: The heart of the operation.
- Wire Strippers: To neatly prepare your wires.
- Electrical Tape: Your trusty companion for insulation.
- Screwdriver: A versatile tool for securing components.
- Wire Connectors: Essential for connecting wires.
- Outdoor-Rated Junction Box: Provides protection for your wiring.
- Wire Nuts: To securely fasten wires.
- Mounting Hardware: Keeping it all in place.

Safety First
Safety should always be our guiding light in any electrical project. Here’s a checklist of safety measures to illuminate your path:
- Turn Off the Power: Prioritize safety by turning off the main power circuit breaker to eliminate any electrical hazards.
- Insulated Tools: When handling electrical components, use insulated tools to prevent shocks.
- Dry Environment: Ensure the installation area is dry to prevent accidents.
- Professional Advice: If any step seems too complex, don’t hesitate to consult a professional electrician.
Now that we’ve set the stage, let’s get into the details of the installation process.
Step-by-Step Installation Guide
1. Power Off for Safety
- First things first, safety! Begin by turning off the main power circuit breaker to ensure a safe installation process.
2. Identify Your Outdoor Lights
- Locate and identify the outdoor light fixtures where you intend to install the photocell sensor.
3. Disconnect Existing Wiring
- Carefully disconnect the existing wiring connected to the outdoor lights. It’s a bit like untangling a string of lights during the holidays – label those wires!
4. Mount the Photocell Sensor
- Securely attach the photocell sensor to your chosen fixture. Think of it as giving your outdoor lighting a smart upgrade.
5. Wiring the Photocell Sensor
- This is where the magic happens! Connect the wires as per the manufacturer’s instructions. Typically, you’ll deal with black and white wires, but don’t forget about grounding.
6. Secure the Wiring
- Use wire connectors and electrical tape to ensure those connections are snug and well-insulated. This step ensures your outdoor lighting will shine reliably.
7. Restore Power
- With the wiring all snug and secure, it’s time to restore power. The photocell sensor is now in charge, automatically controlling your outdoor lights.
Testing and Troubleshooting
We’re almost there! But before we celebrate our successful installation, it’s essential to test the photocell sensor’s functionality:
- Cover the Sensor: Simulate darkness by covering the photocell sensor with your hand or a cloth. Your outdoor lights should spring to life.
- Expose to Light: Remove the cover, exposing the sensor to light, and watch as the lights gracefully fade away.
If your lights don’t perform this magical dance, don’t fret. It’s common to make minor adjustments during this phase to get everything working seamlessly.
Maintenance and Best Practices
To ensure your outdoor lighting remains a shining star in your space:
- Regular Cleaning: Periodically clean the sensor’s surface to prevent dirt or debris from affecting its performance.
- Adjust Sensitivity: Fine-tune the sensitivity settings to align with your outdoor lighting needs.
- Wiring Inspections: Conduct occasional inspections of the wiring to spot any signs of wear or damage. It’s like giving your outdoor lighting a wellness check!
By following these steps, you’ll enjoy reliable outdoor lighting that not only enhances the beauty of your space but also contributes to energy savings and security.
In Conclusion
To wrap it all up, installing a photocell sensor for your outdoor lights is a brilliant way to add convenience, energy efficiency, and safety to your outdoor space. With the right tools, materials, and safety precautions, you can accomplish this project with ease. And remember, if you ever find yourself in the dark about any step, don’t hesitate to seek assistance from a professional electrician.
Thank you for joining me on this enlightening journey. Now, go out there and let your outdoor spaces shine brightly while saving energy. Happy lighting!


2 Responses
I just wanted to jot down a simple comment to be able to thank you for some of the amazing tactics you are posting on this website. My rather long internet look up has at the end of the day been compensated with reasonable suggestions to exchange with my contacts. I ‘d tell you that many of us website visitors actually are extremely lucky to be in a great network with so many special individuals with valuable ideas. I feel somewhat fortunate to have seen the web pages and look forward to many more excellent minutes reading here. Thanks once more for a lot of things.
Thanks for reading!We aim to explain complex lighting technologies in a practical way.